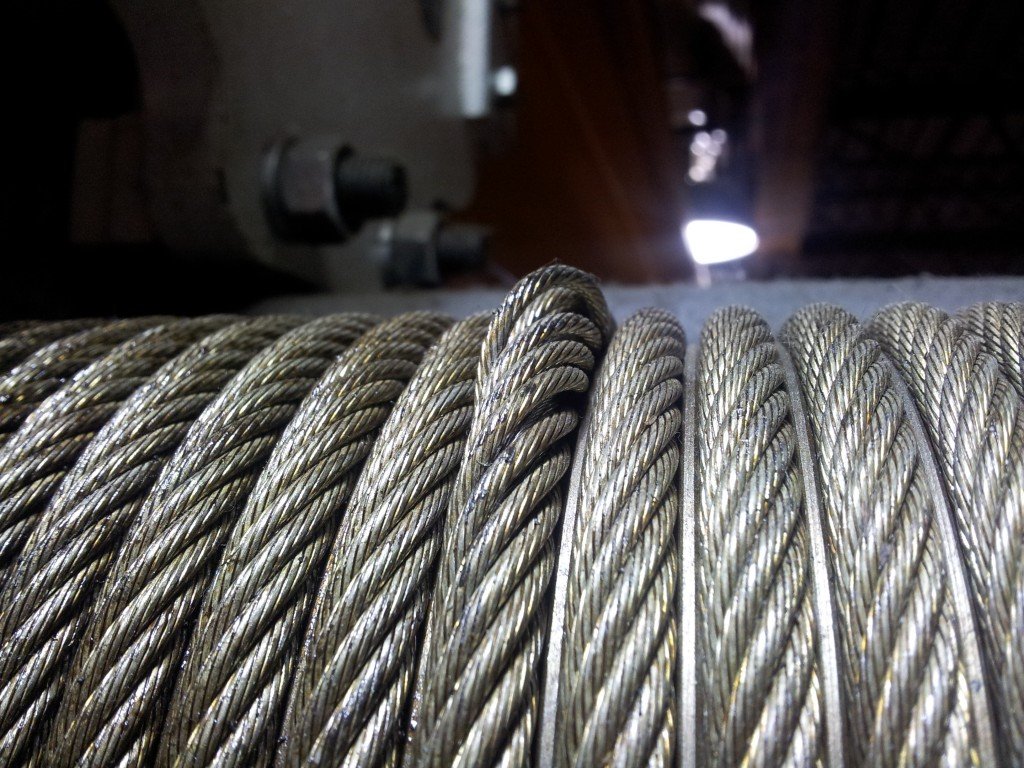
Crane Wire Rope Inspection: Complete Inspection Process
For plant maintenance engineers and competent inspectors carrying out scheduled, pre-use or condition-triggered crane rope inspections.
A useful wire-rope inspection is a repeatable process, not a quick look at the most accessible section. Identify the rope, make the crane safe, inspect the full accessible length and rope system, measure and photograph findings, then document the decision and follow-up.
This page explains that complete workflow. Use the focused companion pages when a finding needs standard-based discard assessment, broken-wire analysis, diameter measurement or internal examination.
If you need a practical inspection form, use the companion wire rope inspection checklist alongside this guide.
Quick Answer: How Should a Wire Rope Be Inspected?
Confirm the rope identity and previous record; isolate the crane; inspect the full accessible rope, terminations, drum and sheaves; check broken wires, wear, corrosion, deformation, lubrication and diameter; photograph and map findings; compare them with the applicable criteria; then record whether to continue, monitor, escalate or replace.
Step 5: Compare Findings with Applicable Criteria
ISO 4309 is one of the most commonly referenced standards for crane wire rope inspection and discard criteria. It does not reduce every rope decision to one simple number. The acceptable condition depends on rope construction, rope diameter, rope category, inspection length, location of broken wires, corrosion, wear, deformation, and application risk.
For a focused breakdown of the standard-style rejection triggers, see the dedicated guide: ISO 4309 wire rope discard criteria.
For a buyer, maintenance engineer, or plant safety team, the practical point is simple: do not judge rope condition only by age. Judge it by documented inspection against defined rejection criteria.
Finding Triage Before Formal Assessment
| Inspection Finding | Why It Matters | Typical Action |
|---|---|---|
| Broken wires in the rope body | Shows fatigue from bending over sheaves and drums. | Count broken wires over the required inspection length and compare with ISO 4309 or site criteria. |
| Clustered broken wires | Indicates localized damage and higher risk than evenly distributed breaks. | Treat as serious; replacement is commonly required after competent inspection. |
| Broken wires near termination | Termination areas are highly stressed and difficult to inspect fully. | Immediate detailed inspection; replacement is often required. |
| Diameter reduction | Can indicate core failure, wear, corrosion, or loss of metallic area. | Measure and compare with rope maker/site discard criteria. |
| Kinking, birdcaging, crushed strands | Permanent deformation changes load sharing between strands. | Reject the rope unless a competent inspector confirms otherwise. |
| Severe corrosion or pitting | Reduces metallic area and fatigue strength, including hidden internal damage. | Detailed inspection or NDT; replace if severe. |
1. Broken Wires (Visible Wire Breaks)
Wire breaks are the most common sign of fatigue. As the rope bends over sheaves and drums, the individual wires fatigue and eventually snap. ISO 4309 provides specific limits for the number of allowable broken wires over a length of 6d (6 times the rope diameter) and 30d.
Rule of Thumb: If you see multiple broken wires clustered together in a short section, or if there are wire breaks at the termination points, immediate replacement is often required.
2. Diameter Reduction
A reduction in the rope's diameter indicates either structural degradation of the core or excessive external wear. This is critical because a thinner rope has a lower breaking strength.
- External Wear: Caused by abrasion against sheaves and drums.
- Internal Wear: Caused by friction between strands or core failure.
Discard Criteria: If the diameter has reduced by 7% or more of the nominal diameter (for fiber core ropes) or 3-5% (for steel core ropes), the rope should be discarded.
Wire Rope Diameter Tolerance and Measurement
Wire rope diameter should be measured with a suitable caliper across the crowns of opposite strands, not across valleys. Take measurements at multiple points, especially near high-wear zones, drum contact areas, and sheave contact areas. A single casual measurement is not enough for rejection decisions.
Diameter reduction should be compared with the rope manufacturer's data, ISO 4309 guidance, and the site inspection procedure. Sudden diameter loss, local flattening, or diameter change near the termination should be treated as high risk.
3. Corrosion
Corrosion weakens the rope by reducing the metallic cross-sectional area and causing fatigue pits. It is particularly dangerous because internal corrosion can be hard to detect visually.
- Surface Corrosion: Light surface rust that can be wiped off is generally acceptable but should be monitored.
- Severe Corrosion: If there is pitting of wires or the rope feels slack due to internal corrosion, it must be replaced immediately.
4. Deformation and Kinking
Deformations distort the rope structure, causing uneven stress distribution. Common types include:
- Kinking: A sharp bend caused by a loop being pulled tight. This is permanent damage and requires immediate replacement.
- Bird Caging: The strands open up in a cage-like formation. This usually happens due to shock loading or sudden release of tension.
- Crushed Strands: Often caused by improper spooling on the drum.
5. Heat Damage
Exposure to extreme heat (e.g., in foundries) can anneal the steel wires, causing a loss of tensile strength. Signs of heat damage include discoloration (bluish hue) or loss of lubrication. If heat damage is suspected, the rope must be replaced.
When Visual Inspection Needs Specialist Escalation
Visual inspection is essential, but it cannot always reveal internal broken wires, internal corrosion, or loss of metallic area. This is where NDT wire rope inspection and electromagnetic wire rope inspection become useful.
Electromagnetic inspection magnetizes the rope and uses sensors to identify localized flaws and loss of metallic area. It is especially useful for high-duty cranes, critical lifting cranes, long-service ropes, corrosive environments, and ropes where internal defects are suspected. Use the dedicated NDT / MRT guide to define the method and report scope.
| Inspection Method | Best For | Limitation |
|---|---|---|
| Daily visual check | Obvious broken wires, kinks, crushing, birdcaging, corrosion, and winding problems. | Cannot reliably detect internal defects. |
| Periodic competent inspection | Formal rejection decision, measurement, termination checks, and discard record. | Depends on inspector skill and access. |
| Electromagnetic / MRT inspection | Internal broken wires, corrosion, and loss of metallic area. | Needs trained operator and interpretation; not a replacement for visual inspection. |
Hoist Rope Inspection Checklist
A hoist rope inspection should include the full rope path, not only the easy-to-see hanging portion. Pay special attention to drum layers, equalizer sheaves, dead ends, wedge sockets, rope clamps, and any point where the rope bends or changes direction.
For a dedicated daily and periodic inspection workflow, see: Wire Rope Inspection Checklist for Cranes and Hoists.
- Check visible broken wires across the rope body and near terminations.
- Measure rope diameter at several locations and compare with baseline records.
- Inspect for kinks, birdcaging, crushed strands, waviness, flattening, and core protrusion.
- Check corrosion, lubrication condition, dirt packing, and heat discoloration.
- Inspect drum winding, rope crossover, fleet angle symptoms, and sheave groove condition.
- Verify end terminations, wedge sockets, clamps, thimbles, and anchorage points.
- Record findings with date, crane ID, rope ID, inspector name, and action taken.
Record the Decision and Follow-up Interval
There is no universal fixed replacement period for every crane wire rope. A rope may last months or years depending on duty class, operating hours, load spectrum, reeving, sheave condition, drum condition, environment, lubrication, and installation quality.
The better policy is condition-based replacement: inspect regularly, maintain records, define rejection criteria, and replace when the rope reaches discard limits or shows unsafe damage. For critical cranes, some plants also set a maximum service life or require NDT at defined intervals. The dedicated replacement-period guide explains how calendar and condition controls fit together.
Summary Checklist for Inspection
| Defect Type | Action Required |
|---|---|
| Visible Broken Wires | Check against ISO 4309 count limits. |
| Measured Diameter Reduction | Record location and reading; compare with the applicable rope data and discard criteria. |
| Kinking / Bird Caging | Remove from service pending competent assessment. |
| Severe Corrosion (Pitting) | Remove from service pending competent assessment. |
Regular inspections are the first line of defense against crane accidents. Always consult a certified inspector if you are unsure about the condition of your wire rope.
Wire Rope Inspection Process FAQ
What should a complete crane wire rope inspection cover?
Identify the rope and review its history, inspect the full accessible length and rope system, measure and map findings, compare them with applicable criteria, and document the action and follow-up.
Which parts of the rope system should be inspected?
Include high-wear bending zones, crossover areas, terminations, dead ends, equalizer and running sheaves, drum grooves and the winding pattern. A hanging section alone is not a complete inspection.
What should the inspection record contain?
Record crane and rope identity, date, inspector, rope data, locations examined, measurements, a defect map, photographs, comparison criteria, decision, responsible person and follow-up date.
Is a daily visual check the same as a periodic inspection?
No. A pre-use check identifies obvious changes. A periodic inspection is a documented examination by a competent person using measurements, history and applicable assessment criteria.
What actions can follow an inspection?
The recorded outcome may be continued use, maintenance permitted by the manufacturer, correction of a rope-system problem, shorter inspection interval, specialist examination, removal from service or replacement.
Standards and Inspection References to Ask For
When discussing rope rejection criteria with a supplier, maintenance contractor, or third-party inspector, ask them to state the standard and method used. For crane ropes, common references include ISO 4309 for inspection/discard guidance, rope manufacturer certificates, crane maker maintenance manuals, site safety procedures, and NDT/MRT inspection reports where applicable.
If your team needs a simpler rejection checklist before speaking to a vendor or inspector, start with this companion article: ISO 4309 wire rope rejection guide.
Wire Rope Topic Hub
Use the Crane Wire Rope Guide to move through selection, inspection, discard decisions, replacement and supplier discovery. These focused guides answer individual inspection questions.
This article is a practical buyer and maintenance guide. Final rejection decisions should be made by a competent person using the applicable standard, rope data, crane duty, site conditions, and inspection evidence.
Buying or Replacing Wire Rope?
Use the free buyer toolkit to compare rope construction, grade, safety factor, sheave fit, certificates, vendor questions, and replacement checks before approving a quote.
Open Wire Rope Buying Toolkit